In this guide you will learn how to create a new Virtual Private Clouds (VPCs), modify, and remove a Virtual Private Cloud via your client portal.
Creating a Virtual Private Cloud
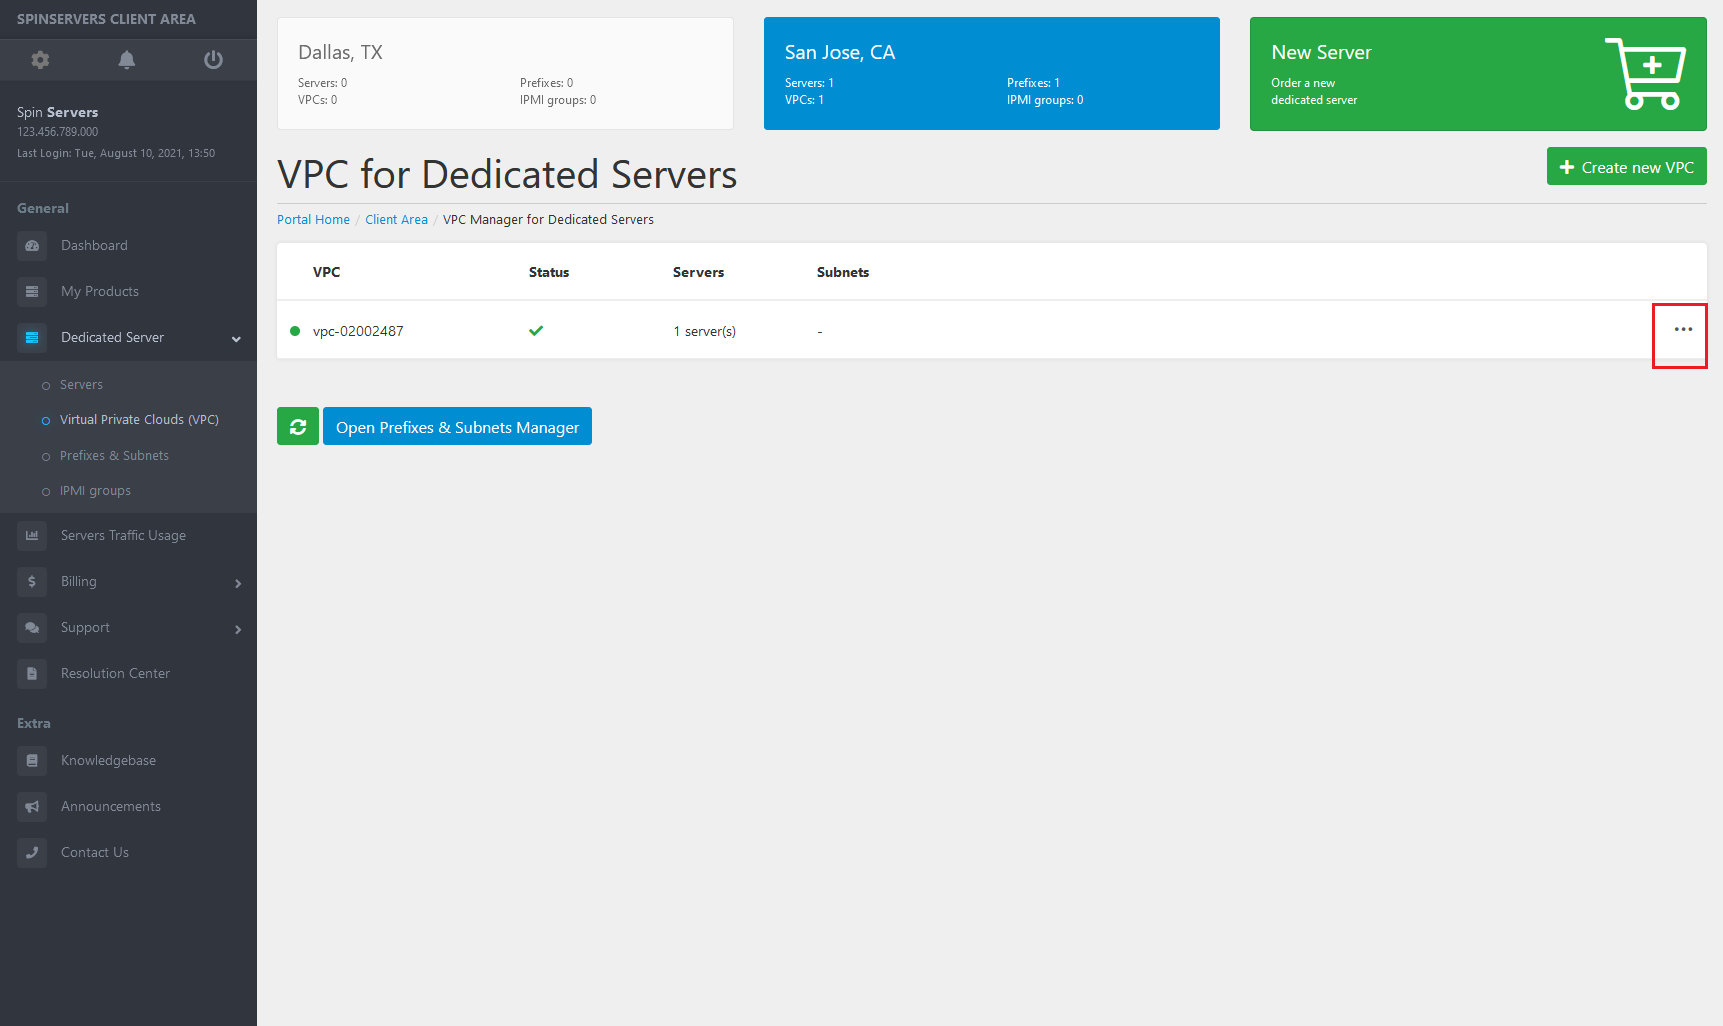
From your dashboard, navigate to the ‘Dedicated Server’ tab and click the drop down tab to view the navigation options.
Click ‘Virtual Private Clouds (VPCs)’ to open the VPC Manager. This page allows you to manage one or all of your virtual private clouds.
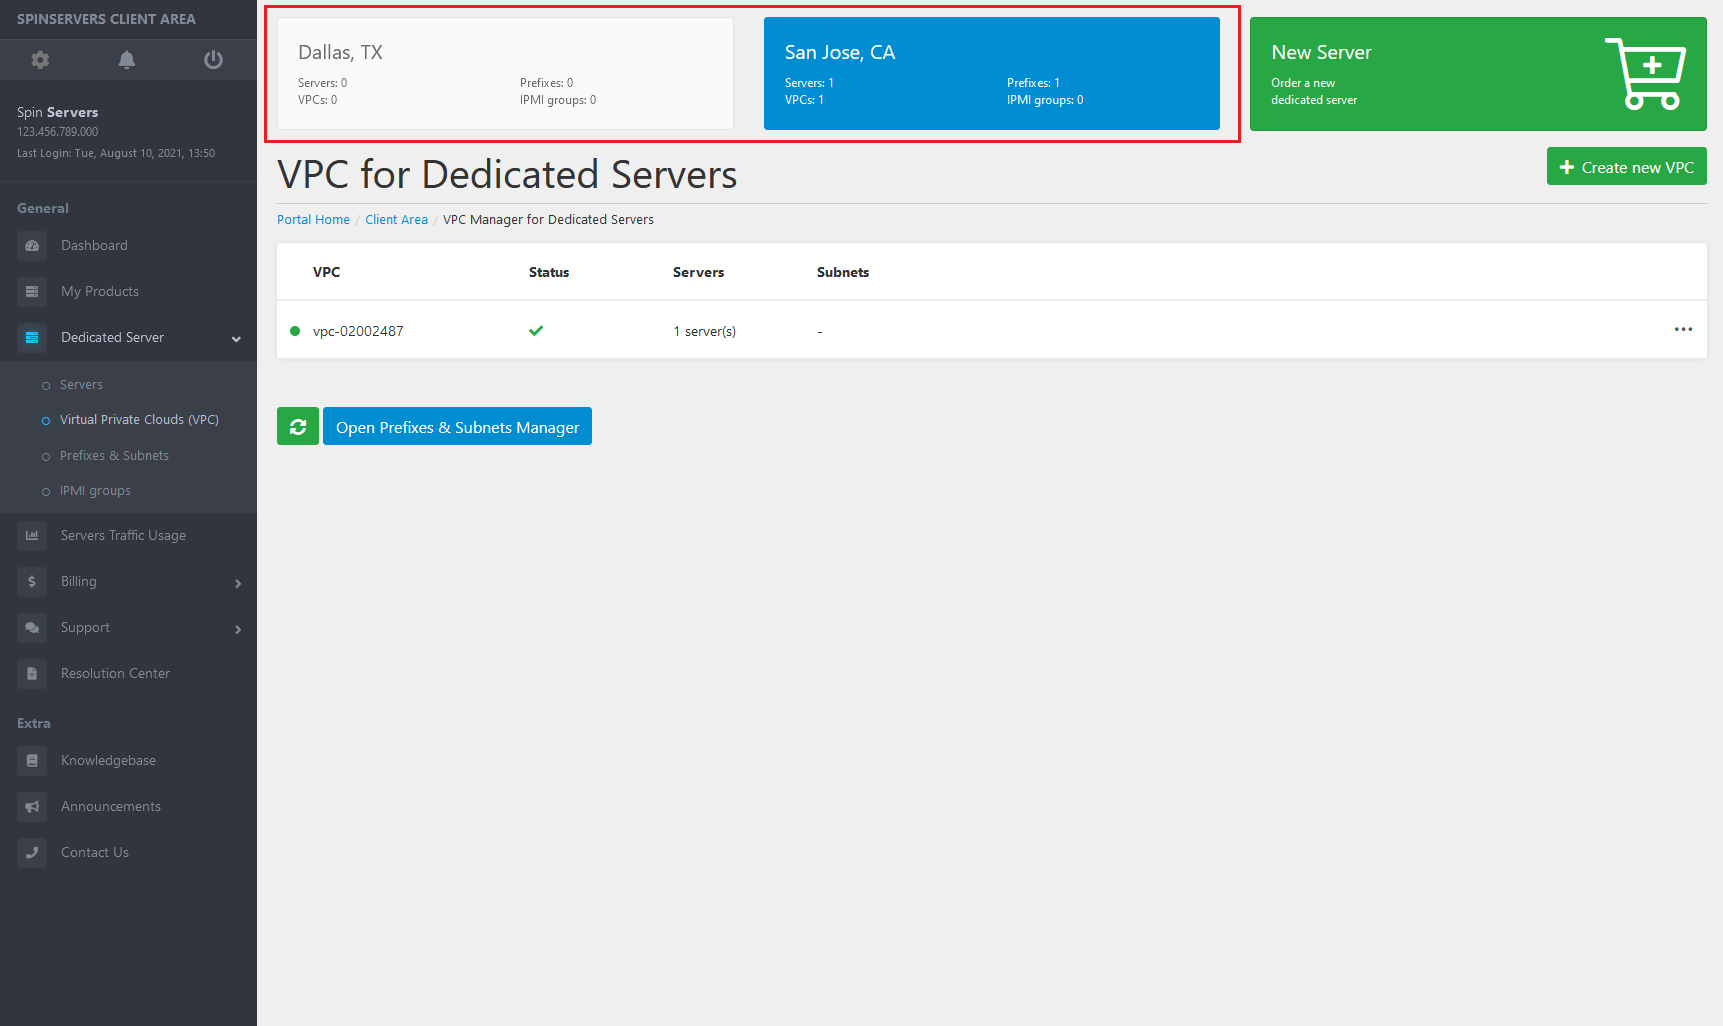
On the top of your screen you will see two boxes for each of our data center locations (Dallas, TX and San Jose, CA). Be sure you have selected which location you want to add a VPC to before continuing.
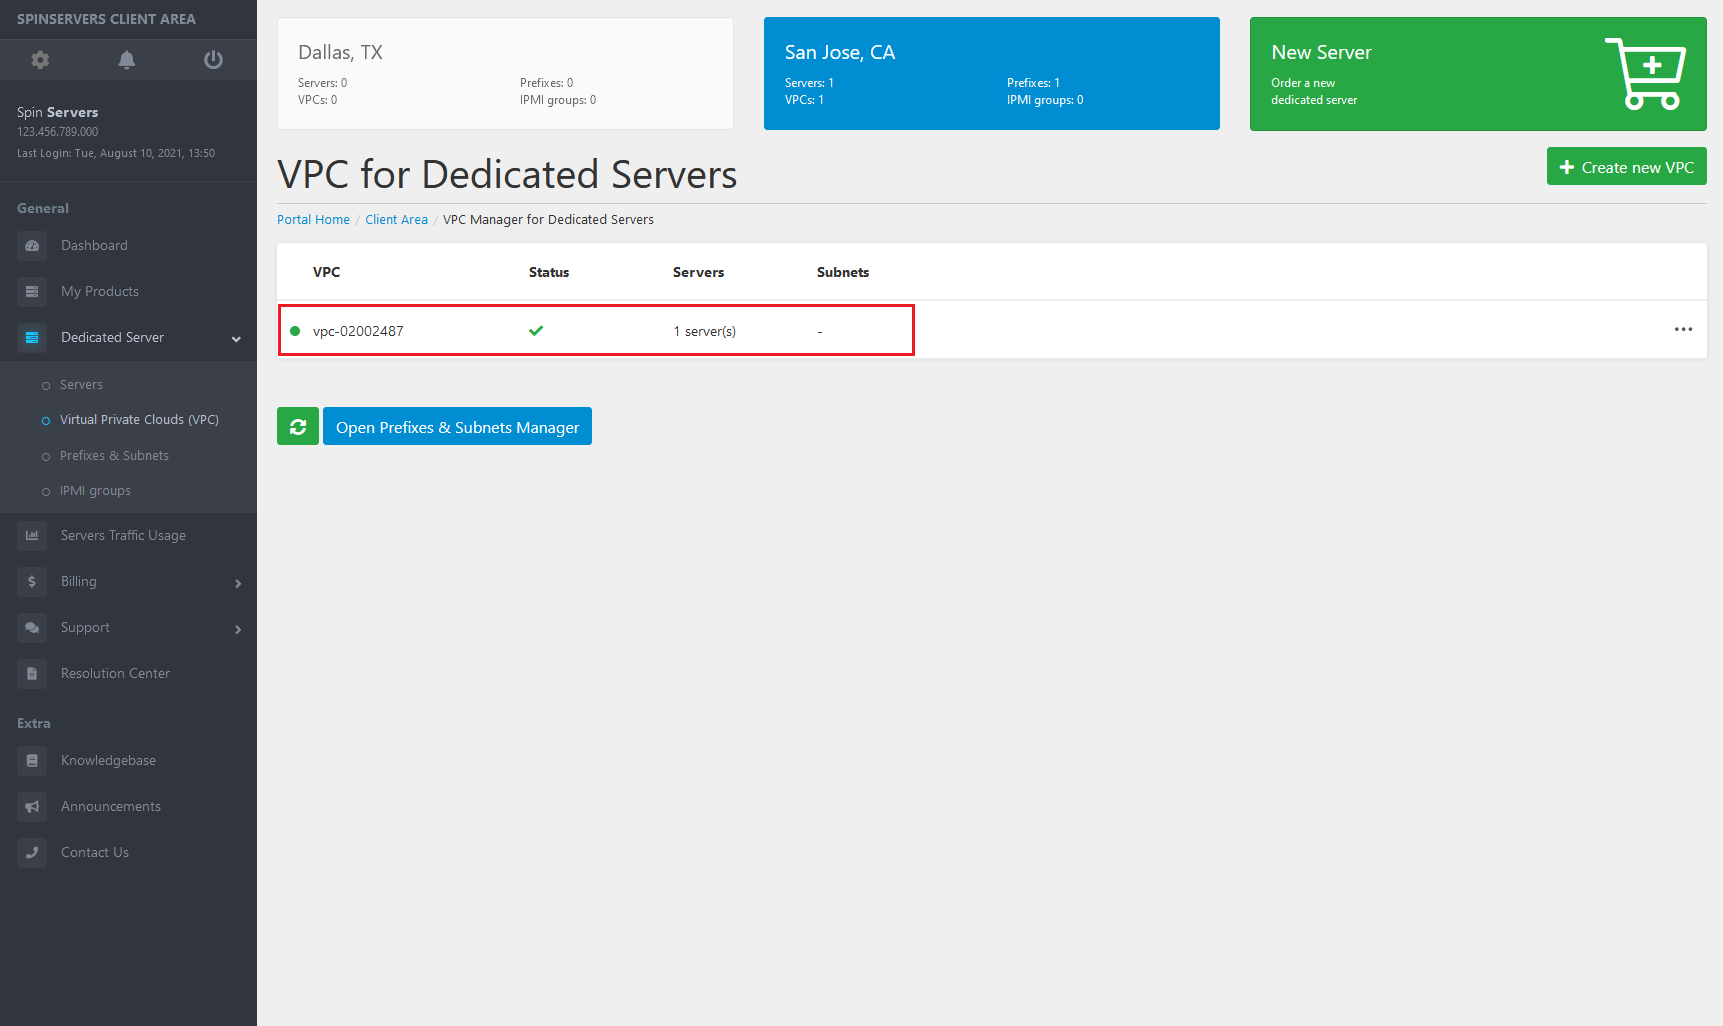
With your location selected you should be able to view any current VPCs that are active and which servers have been assigned. You will see VPC, Status, Servers, and Subnets above the list of all VPCs you have created.
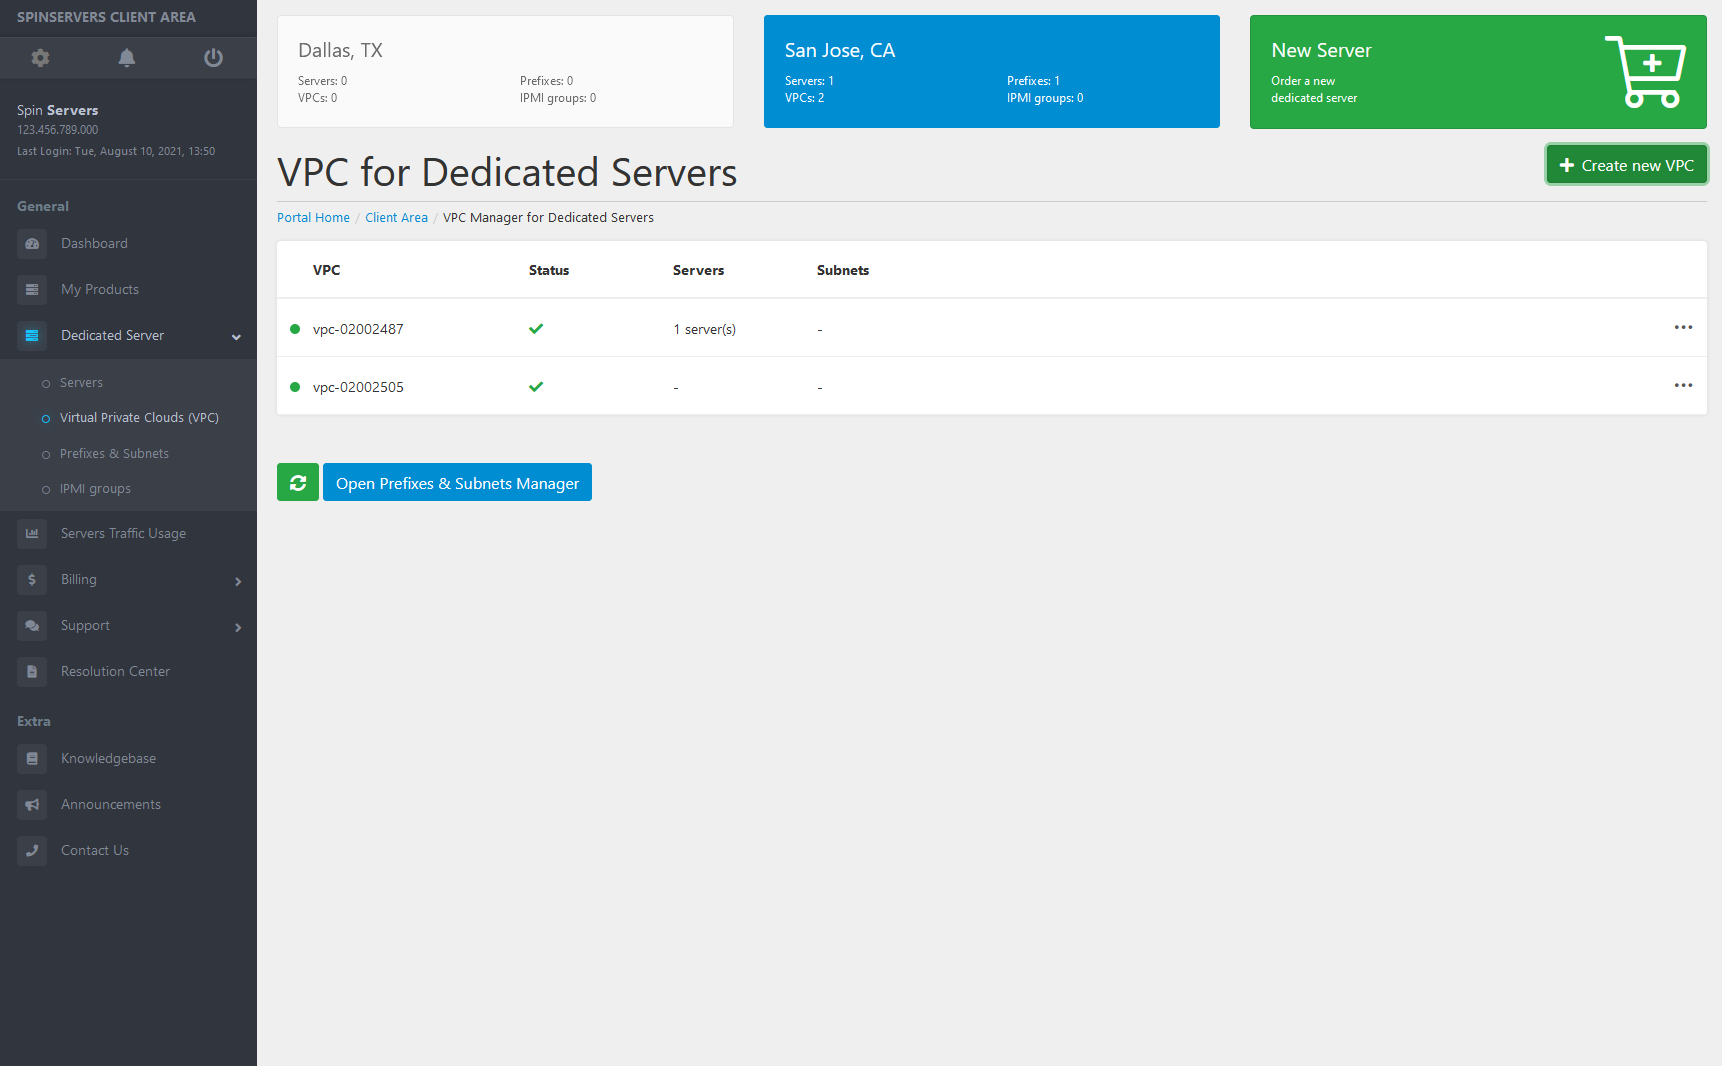
Let’s create a new virtual private cloud by clicking the green ‘Create New VPC’ button in the top right corner.

This will instantly create a new virtual private cloud and will be listed in your VPC Manager. You should see a new blank VPC added to your manager.
Modifying a Virtual Private Cloud
Now that we know how to create a new virtual private cloud, let's learn how to add/move a server to the newly created VPC and a few other options in the editor.
First we will move our current server over to our new virtual private cloud.
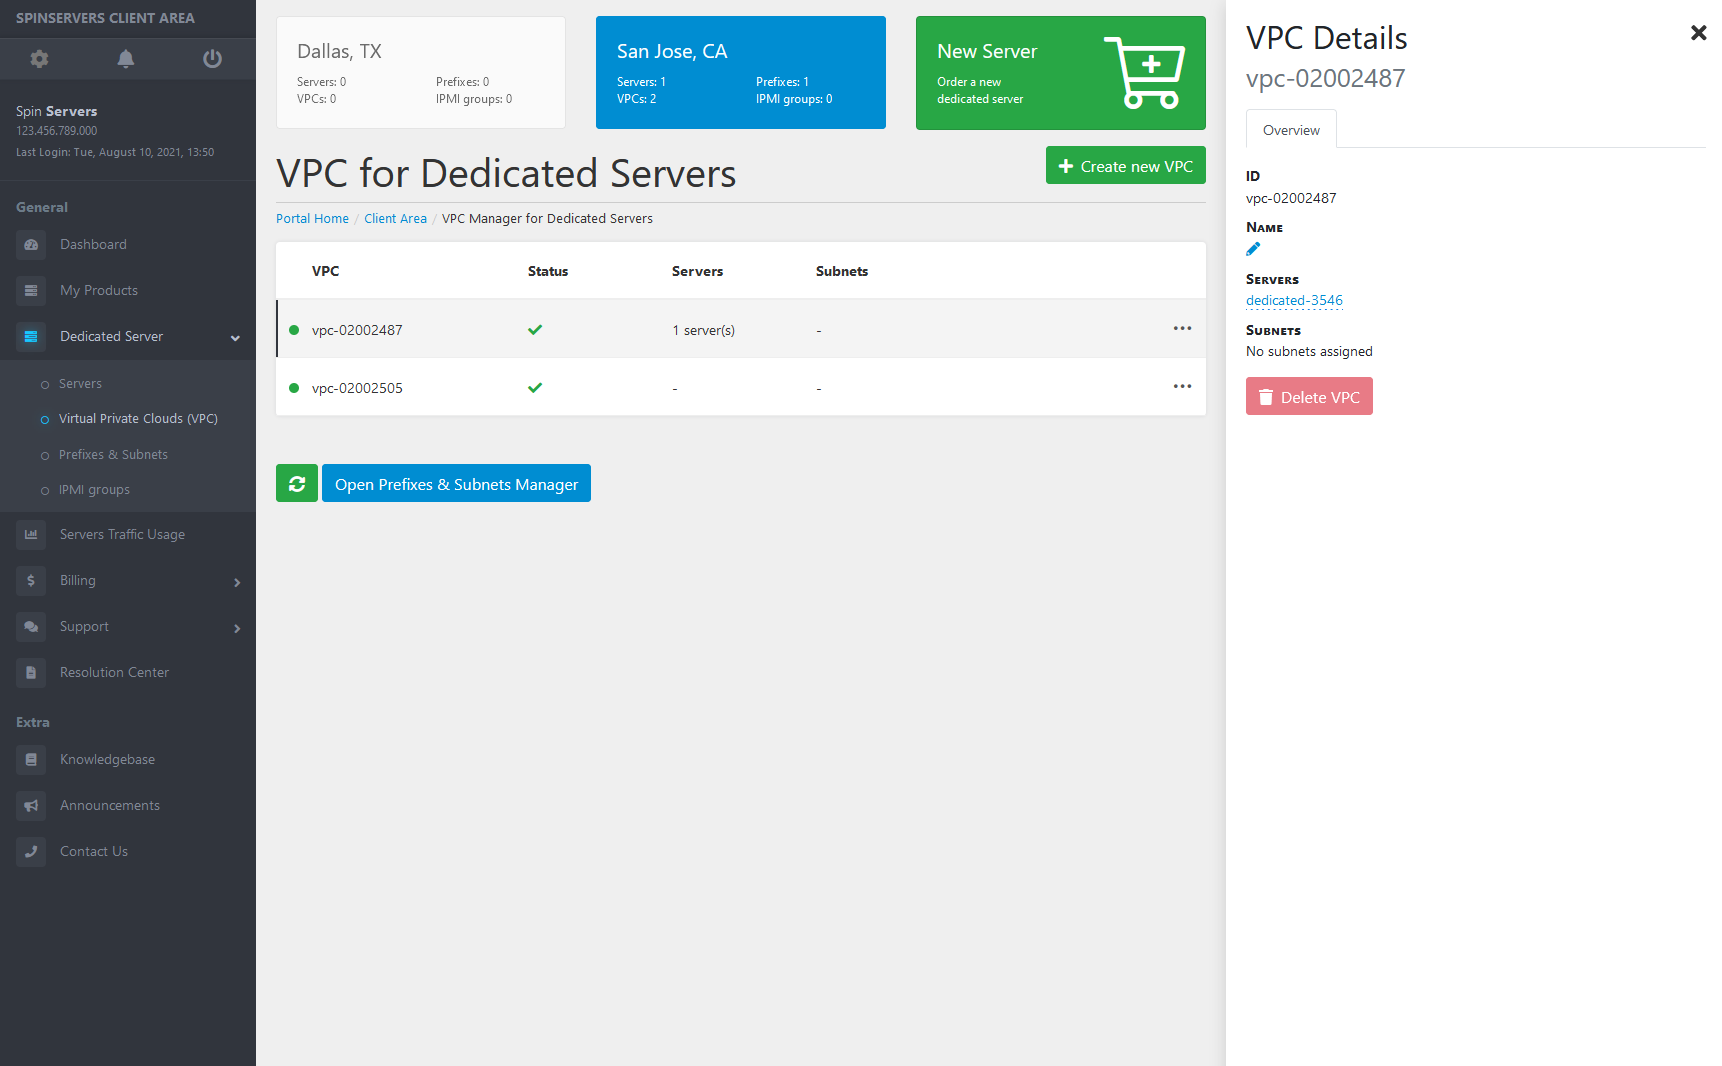
To the right of each VPC you will see a gray ellipsis icon (3 grey dots). Click this icon to open the VPC details menu.
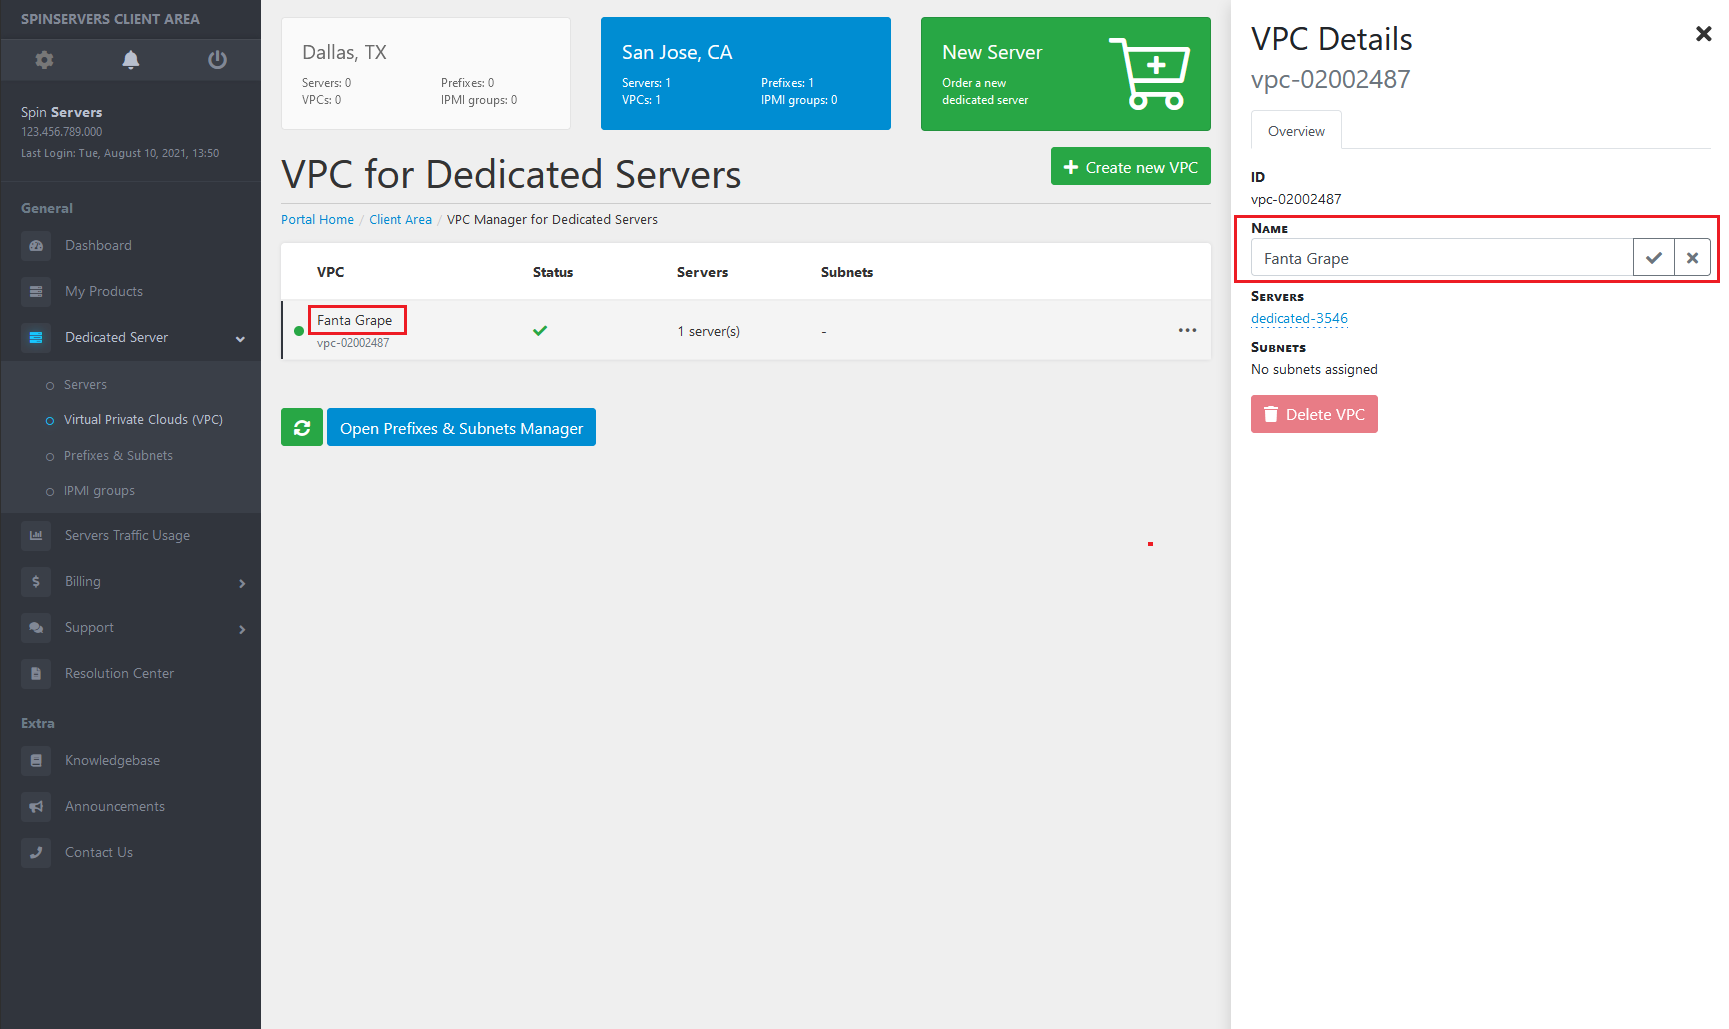
Now you can see the details of our VPC including the ID, name, servers assigned, and subnets.
Clicking on the pencil icon will allow you to change the name of each virtual private cloud to make organization more simple.
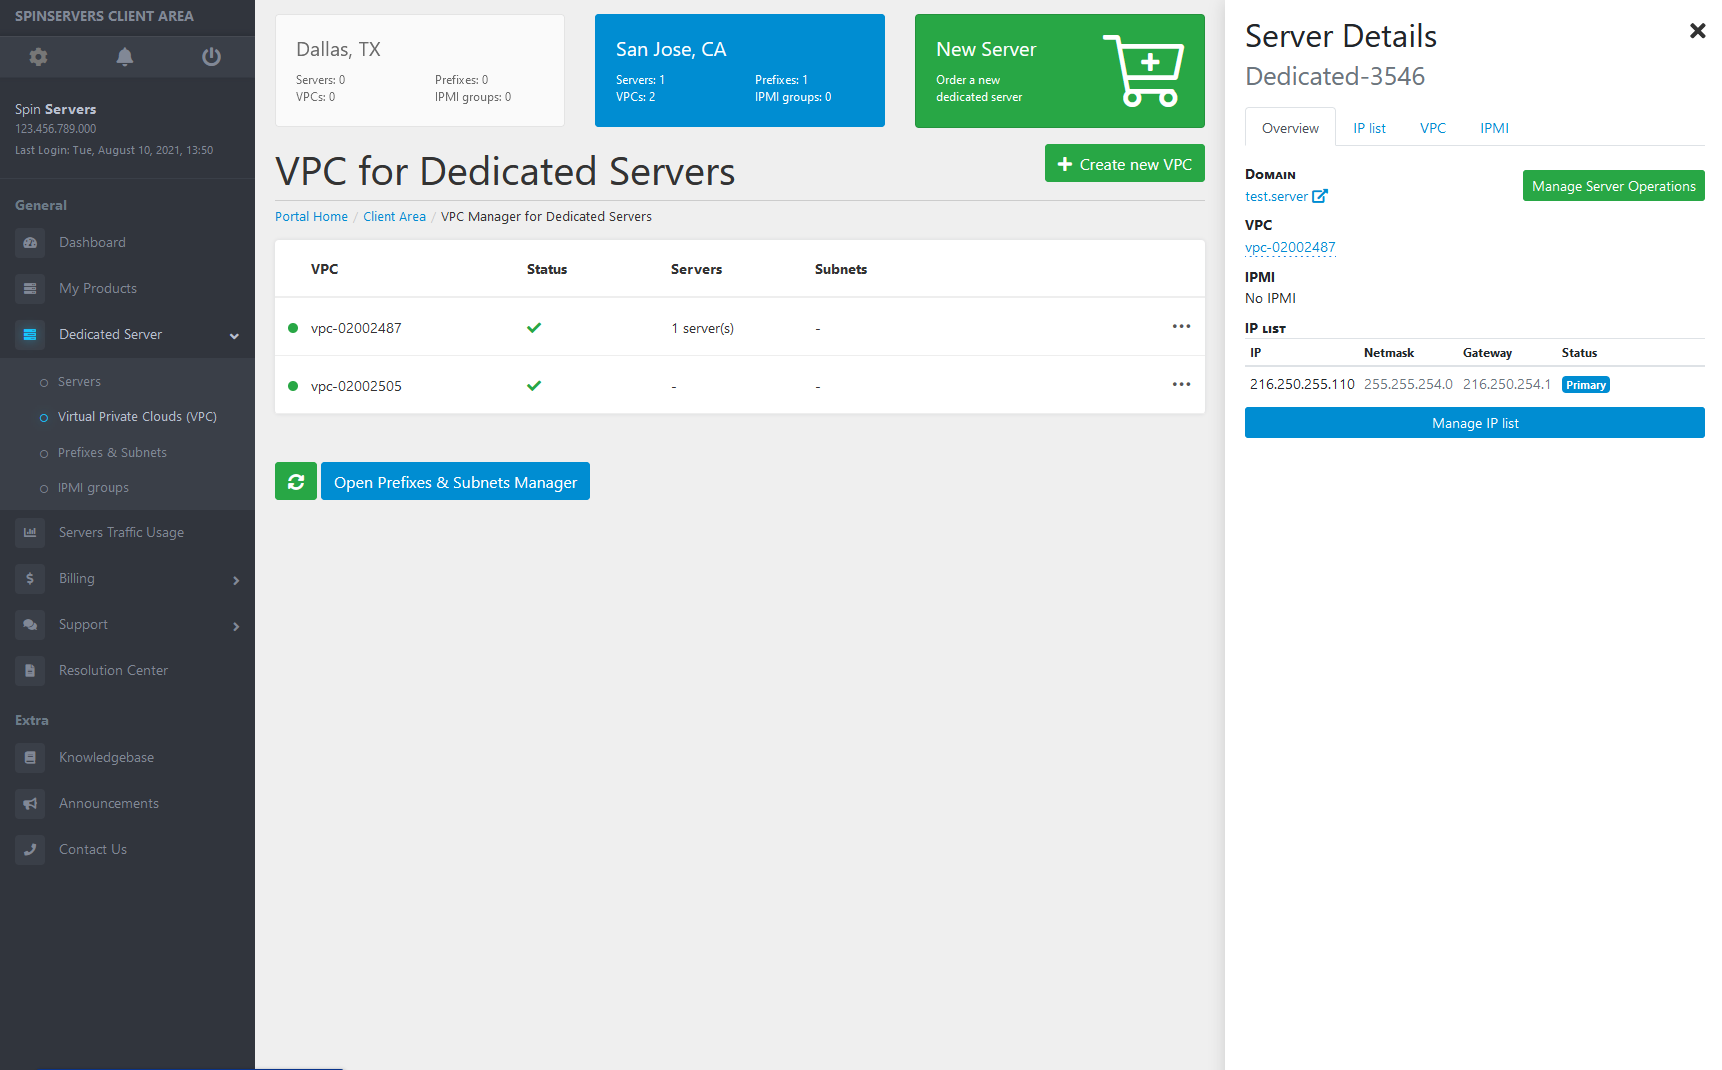
Let’s move that server over to our new VPC, click the server under ‘Servers’ in the details menu. In our case it's ‘dedicated-3546’.
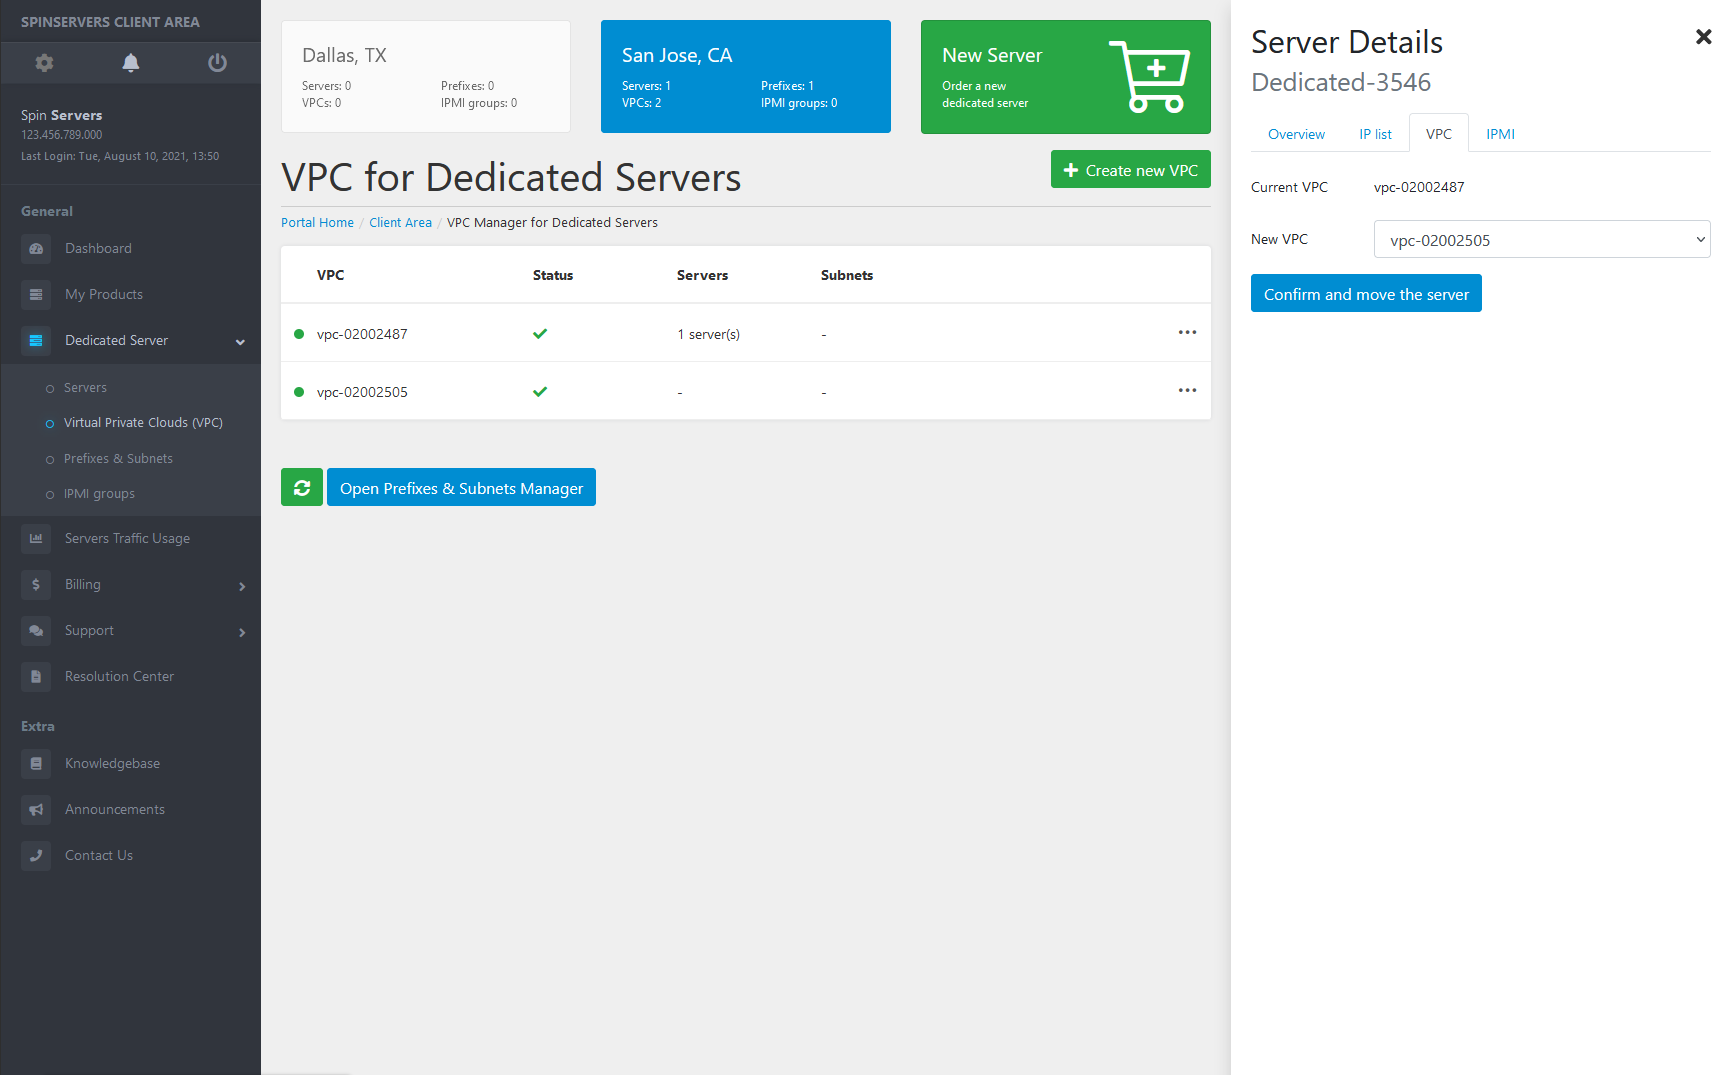
Next you will see the domains, VPC ID, IPMI, and IP Lists associated with this VPC. Click the blue ‘VPC’ tab in the details menu.
Select the new VPC we just created in the first step and click ‘Confirm and Move the Server’. Now, you will see the server is assigned to the newly created VPC.
Removing a Virtual Private Cloud
Sometimes you may need to remove an unused or old VPC. Removing a VPC from your VPC Manager is simple.
Locate the gray ellipsis icon (3 grey dots) to the right of the VPC you want to remove. Click this icon to open the VPC details menu.
In the details menu you will notice a large red ‘Delete VPC’ button at the bottom of the details menu.
Clicking this button will permanently remove the VPC from your VPC manager.
Naming a Virtual Private Cloud
Naming each VPC is a great way to keep things organized. To do so, Locate the gray ellipsis icon (3 grey dots) to the right of the VPC you want to remove. Click this icon to open the VPC details menu.
Then click the blue pencil icon under ‘Name’. You will see a text box open allowing you to input your new name for your VPC.
Click the check mark to save your changes.