Have you ever created a web server, opened the terminal, and noticed the number of login attempts while you were offline? Attackers use a method called ‘brute forcing’. Brute forcing is a method of gaining access to a web server by inputting random passwords, using a script, in hopes of gaining access.
To help prevent this we use a tool called Fail2Ban.
What is Fail2Ban?
Fail2Ban is an intrusion prevention software framework that protects computer servers from brute-force attacks. Written in the Python programming language, it is able to run on POSIX systems that have an interface to a packet-control system or firewall installed locally, for example, iptables or TCP Wrapper. — Wikipedia
Installing Fail2Ban
In this guide, we are going to cover installing and configuring Fail2Ban on a Ubuntu 20.04 web server.
Step 1 — Update the system and Install Fail2Ban
Let’s run our update command.
$ sudo apt update && sudo apt upgrade -y
Now let’s install Fail2Ban.
$ sudo apt install fail2ban

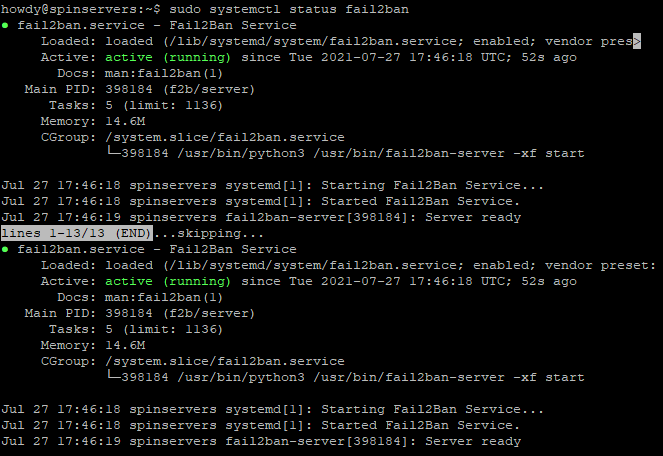
Once installed, Fail2Ban should start automatically. Just in case, let's check its status using the command below to make certain.
$ sudo systemctl status fail2ban

Our install of Fail2Ban is installed and active. :)
Step 2 — Configure Fail2Ban
When installing Fail2Ban, the script creates two configuration files, /etc/fail2ban/fail.conf and /etc/fail2ban/fail.d/defaults-debian.conf . Any changes to these files have a chance of being overwritten during package updates.
Fail2ban reads the configuration files in this order. The .localfile overrides the settings of the .congfile.
/etc/fail2ban/jail.conf
/etc/fail2ban/jail.d/*.conf
/etc/fail2ban/jail.local
/etc/fail2ban/jail.d/*.local
The most efficient way to configure Fail2Ban will be by copying the content of jail.conf to jail.local then modify the local file.
Step 2.1 — Create our local file and configure the server
Now let's copy over our jail.conf file to our jail.local file.
$ sudo cp /etc/fail2ban/jail.{conf,local}
After inputting this command, the terminal will immediately open a new line.*
Configure the Fail2Ban server by opening up the jail.local file with nano or your favorite text editor.
$ sudo nano /etc/fail2ban/jail.local
You should now be in the jail.local file and see comments describing what each configuration does.
Step 2.2 — Whitelist IP Addresses
IP Addresses, ranges, and hosts you want to exclude from banning need to be added to the ignoreip directive.

Uncomment (remove the # symbol) the ignoreip line and add your IP addresses separated by a space.
Step 2.3 — Ban Rules Settings
A few lines below the ignoreip comment, you will find bantime, findtime, and maxretry.
bantime is the length of time the IP is banned. Default ban time is 10 minutes. More than likely you will want a longer bantime . You can ban a user permanently by using a negative number. If you do not use a suffix, (i.e., 10 instead of 10d) the time will be in seconds. You can set this time for whatever duration you like, we will use 10d.
bantime = 10d
findtime is the length of time between the number of failures before the IP is banned. This is different from maxretry as this doesn’t ban based on the number of login attempts, rather than the amount in succession.
finetime = 5m
maxretry is the number of failed logins before the IP is banned. Again, you can set this to your liking.
maxretry = 5
Step 2.4 — Email Notifications
Fail2Ban can be set up to send email alerts when an IP has been banned. You must have SMTP configured on your web server. The first step is we need to change the action comment.
action = %(action_MW)s
This bans the IP and sends an email alert with a whois report. If you want to include logs in the email add use %(action_MWl)s instead.
You will also need to adjust the sending and receiving email addresses in order for the system to correct alert you.
destemail = [email protected]
sender = [email protected]
Step 2.5 — Jails
A jail in Fail2Ban is a combination of a filter and one or several actions. A filter defines a regular expression that matches a pattern corresponding to a failed login attempt or another suspicious activity. Actions define commands that are executed when the filter catches an abusive IP address. — Plesk
Fail2Ban comes with a variety of jails for different services. Including the option to create your own custom ones.
A default install of Fail2Ban has an ssh jail enabled. To enable a jail, you will need to add enabled = true after the jail title. Using OpenWebMail as an example:
[openwebmail]
enabled = true
port = http,https
logpath = /var/log/openwemail.log
If you want to set ban rules for a service you can do so under the service.
[sshd]
enabled = true
maxretry = 5
findtime = 5m
bantime = 10d
ignoreip = 192.169.0.1/8 12.34.56.78
You can edit filters in the /etc/fail2ban/filter.d directory.
Step 3 — Restart Fail2Ban
After every finished install and configuration, it is best to restart to service for the changes to take effect.
$ sudo systemctl restart fail2ban
Step 4 — Fail2ban Command Line
Using the tool fail2ban-client you can make changes with the Fail2Ban script. To use the command line, use:
$ sudo fail2ban-client [followed by your command]
To view available options use:
$ sudo fail2ban-client -h
Here are a few handy commands:
Unban IP address:
$ sudo fail2ban-client set sshd unbanip 12.34.56.789
Ban an IP address:
$ sudo fail2ban-client set sddh banip 12.34.56.789


